
Pastéis de Nata Recipe
*Disclosure: I only recommend products/services that I would use myself & all opinions expressed here are my own. This post may contain affiliate links meaning that, at no additional cost to you, I may earn a small commission which in turn helps fund my next adventure! Please read the Privacy Policy for more information.
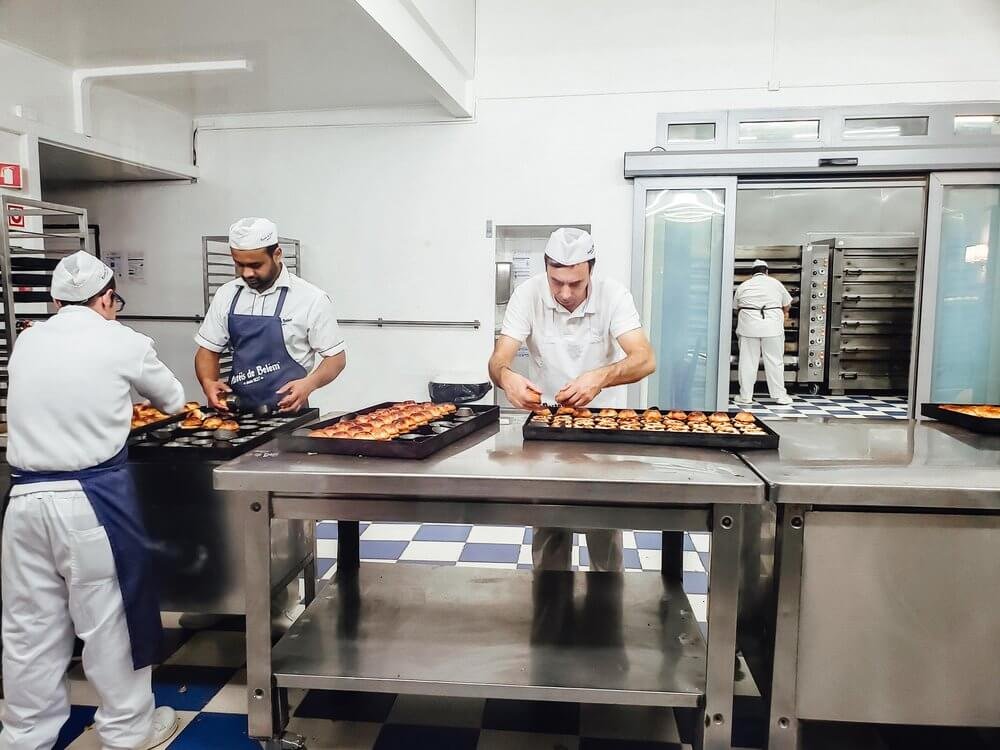
Ahhhh… pastéis de nata! If you’ve ever been to Portugal then you’ve probably treated yourself to a sleeve or two of these delicious pastries, and if you haven’t ever been then you need to go there as soon as you can because you’re truly missing out on so much! Pastéis de nata are Portuguese custard tarts that were created in Lisbon dating back to the 18th century and have a sweet cream filling surrounded by layers of flakey crust. In all honesty, I’ve never been a fan of custard type desserts but I had to try one of these when I visited Lisbon earlier this year and let’s just say I couldn’t get enough. Our hotel served them at breakfast every day and you can find them all over the city, but the most famous spot is Pastéis de Belém (pictured below). They have a deep history woven into the city of Lisbon and turn out thousands of these pastries every single day! Another one of my favorite places to pick up these sweet treats is Manteigaria which has a location inside of the Time Out Market eating hall. As you can imagine after treating myself to these pastries for 4 days straight, I was quite sad to leave such a beautiful city and my pastries behind and have been daydreaming of them ever since. Lucky enough, I discovered that Airbnb offers virtual cooking classes due to all of the changes from Covid-19 (one of the only good things I’ve found from this pandemic) and they have a Pastel de Nata cooking class taught by a local who knows the recipe by heart! Last week I finally took the class and I enjoyed it SO much! It brought back so many happy memories of traveling and it was so nice to connect with someone in a different part of the world and learn from them. Classes are kept small (usually no more than 10 people per session) and there was only one other participant during my class which I loved. I highly recommend taking a virtual class like this one if you can (it’s less than $30!) because these are not the easiest treats to make and Inês will guide you every step of the way to make sure your tarts come out right!

Fair warning here, the dough is the hardest part but even if you butcher your dough, they still turn out amazing!
Once you combine your ingredients for the dough and work the dough with your hands until it’s no longer super sticky, you’ll let it rest for about 5 minutes or so and then roll it out on a floured surface into a large enough rectangle that your stick of butter will fit in the middle with enough dough on either side to wrap over the butter. After you’ve placed your butter in the center (make sure your butter is VERY cold, otherwise it will ooze out of the edges), you’ll fold over one side of the dough so that it completely lays over the butter and then you’ll fold over the opposite side, followed by the top & bottom portions of the dough. You’re butter should be tucked nicely inside the dough now & you can now take your rolling pin and start to flatten out your dough again, careful that the butter doesn’t ooze out the sides. When your dough is pretty flat, fold your dough inward 3 times and roll it out again. You’ll repeat this step a couple of times, incorporating the butter into the dough and building layers. On the last time, you’ll roll your dough to be about 1-2 cm thick if you can (my dough was not cooperating so I left it thicker, and that’s okay too) & into a rectangle. Lastly, you’ll roll your dough by hand into a type of swiss roll or log and you’ll cut the log into slices about an inch thick (see images below).
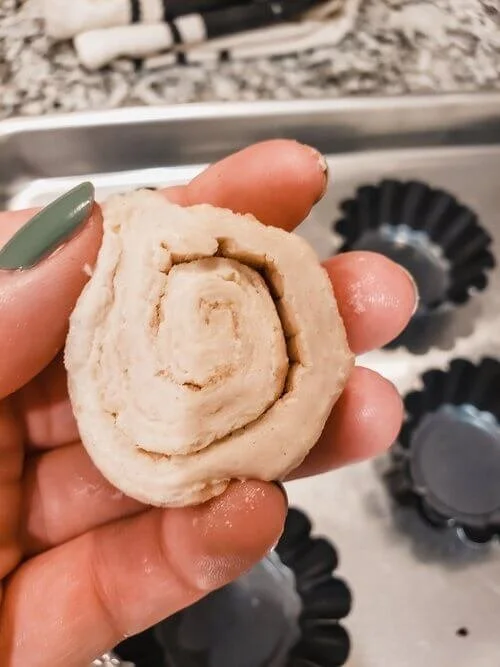
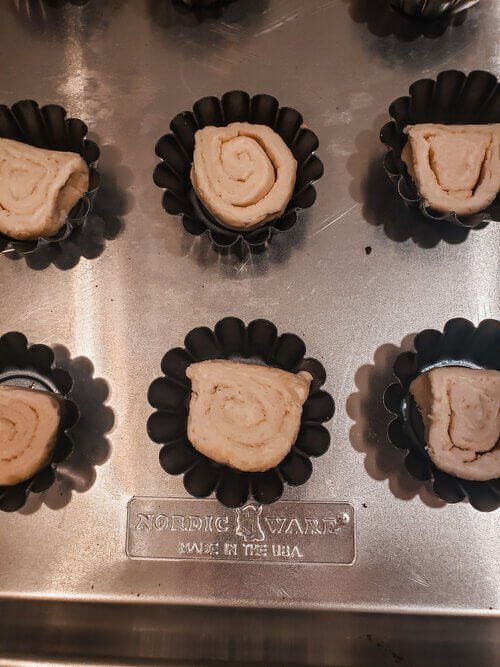
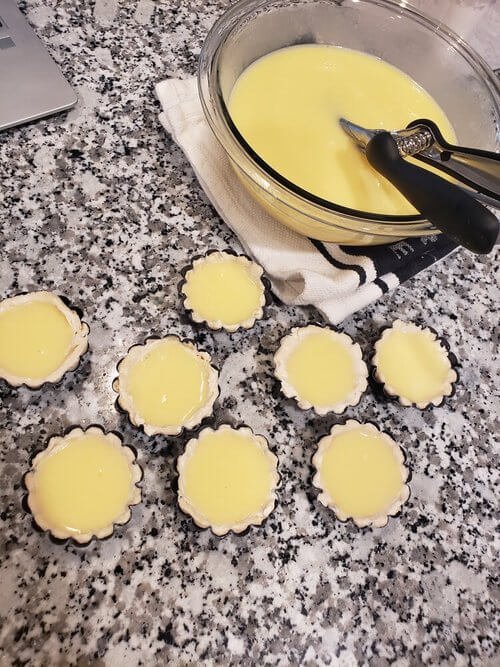
Place each slice into your tart tins like the image above, but you could use a muffin tin if that’s all you have handy. Now for the shaping part! Use your thumb to press down on the dough in the center of the tin, then press the dough evenly around the sides. You want a pretty thin bottom so that the dough cooks all the way through. Once the dough has been pressed in all of your tins, you can move on to creating the custard.
You’ll need two saucepans for the custard. Combine your sugar & water in one and add in a slice of lemon peel and 1 cinnamon stick and bring to a boil. In your other pot, combine the milk & flour and whisk on high heat until it becomes thick. You should be able to lift your whisk to see a shiny stream falling back down. Take both pots off the heat and slowly stir the sugar water into the milk + flour mixture to combine. Continue to stir for a bit until your mixture has cooled a little. Place your egg yolks in a bowl & slowly stir the mixture into the bowl with egg yolks & combine. The key is to do this step slowly so that you do not cook your egg yolks! Your mixture should look like the below image.
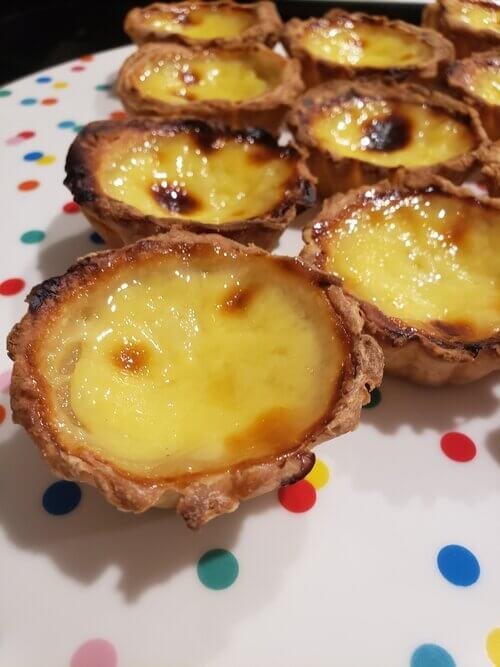
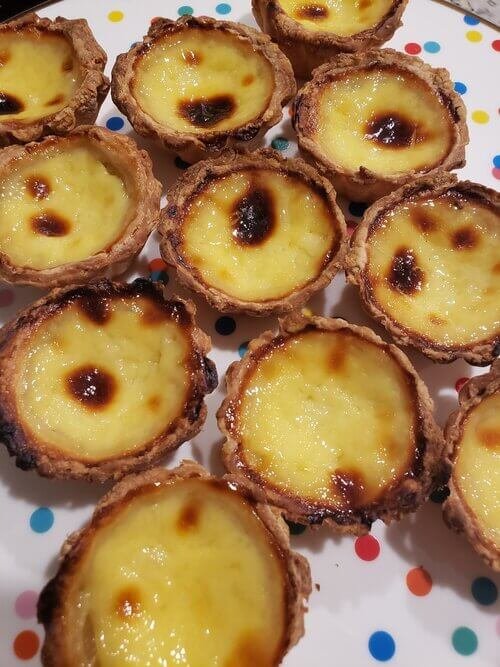
Lastly, you will fill your tart tins with the custard and place on a baking sheet. Pop these babies into the oven at 400 degrees (or the highest your oven will go) and bake for 12-15 minutes. Once they are bubbling and have a little color on the crust, turn your broiler on for about 2 minutes to give the custard more color. Remove from the oven, LET COOL THOROUGHLY, and enjoy! My finished product is pictured below and as you can see, my crust was a little thick on some but the taste was amazing so I didn’t mind at all! These turned out pretty good for my first time and I will be trying again soon!
*Tip: This recipe make quite a bit of custard filling. If you are cooking for 1 or 2 people, I suggest cutting the recipe in half. You can use your leftover custard filling for crème brûlée or you can even whip up some ice cream with it.
Pasteis de Nata Recipe:
Ingredients:
Dough:
2 cups All Purpose Flour (250g)
1/2 cup of water (125ml)
1/2 cup of (VERY COLD) Vegetable Margarine (125g)
Pinch of salt
Custard:
1 cup sugar (200g)
3/4 cup of water (175ml)
Lemon peel
1 Cinnamon stick
4 tbsp All Purpose Flour (40g)
1 1/2 cups of milk (250ml)
6 egg yolks
Dough Directions:
Combine the flour, water, and salt in a bowl.
Let it rest for 5 minutes.
Roll out the dough on a floured surface into a rectangle & set the butter in the center.
Fold each side of the dough to the opposite side, covering the butter completely.
Once the butter is wrapped inside of the dough, smash the center with a rolling pin until the butter flattens and roll out the dough.
Fold the dough inwards like a tri-fold and roll the dough out again. (Repeat at least 3 times.)
Roll out the dough one last time into a big rectangle. Sprinkle a little bit of water over the dough & roll the dough like a swiss roll with your hands.
Cut the dough into about 1 inch thick slices.
Press the dough into the tart tins.
Custard Directions:
In a saucepan combine sugar, water, lemon peel & the cinnamon stick.
Bring to a boil and let boil for 2 minutes. Remove from heat.
In a second pan, whisk together the milk and flour.
Cook the milk and flour on high heat, whisking continuously until it reaches a shiny, smooth texture then remove from heat.
Slowly stir the sugar water mixture into the custard until smooth.
Slowly add the custard into the egg yolks. Only pour a small amount at a time so that the eggs do not cook.
Fill the tins (already with the dough) but leave a little room at the top.
Place in the pre-heated oven and cook for 12-15 minutes on 400 degrees Fahrenheit.
Turn on the broiler for a minute or two to get a nice brown color on top.
*Yields 2-3 dozen.


Tess Arnold
Hi! I’m Tess, founder of TravelingTessie.com, and not only do I love to travel, but I love immersing myself in new places and finding off the beaten path experiences wherever I go! I’ve lived in 4 different states & traveled to 13 countries and counting. I believe that tourism is meant to benefit both visitors and locals alike—and I want to bring that idea back into the travel industry by highlighting companies run by locals such as tours, hotels, restaurants, and more. On Traveling Tessie you can find hidden gems in top destinations around the world, travel tips, detailed city guides, and tons of inspiration for your next trip! If you love travel as much as I do, then please join me on this journey! I hope you enjoy my content as much as I enjoy providing it for you!